iCloud Control Panel for Windows

http://support.apple.com/kb/DL1455?viewlocale=ko_KR

image

이번에 IOS5로 업글되면서 클라우드 기능이 생김

예를들어 아이폰에서 찍은사진은 자동으로 iCloud 로 전송되며 윈도우즈에서도 자동으로 내려받을수있다.

image


iCloud란?

http://help.apple.com/icloud/index.html#mmfc0efea4

iCloud는 음악, 사진, 응용 프로그램, 연락처, 캘린더 등을 저장하고 모든 iOS 5 장비와 컴퓨터로 푸시합니다. iCloud는 Apps와 완벽하게 통합되므로 모든 작업이 자동으로 수행됩니다.

예를 들어 Mac 또는 Windows 컴퓨터의 iTunes에서 노래를 구입하면 iPod touch 및 iPad에 나타납니다. iPhone으로 사진을 찍으면 iPad에 자동으로 전송됩니다. 또한 Pages 도큐멘트를 iPhone에서 만든 후 iPad에서 다듬을 수도 있습니다. iOS 장비를 도킹하거나 컴퓨터와 동기화할 필요가 없습니다.

MobileMe 로고.

iCloud에는 다음이 포함되어 있습니다.

  • iTunes 클라우드(미국만 해당): iTunes에서 구입한 음악이 장비에 자동으로 나타납니다. 전에 구입한 음악 또는 TV 프로그램을 다운로드할 수도 있습니다.

  • 사진 스트림: iOS 장비 중 하나에서 사진을 찍으면 동기화하지 않아도 다른 장비에 자동으로 나타납니다.

  • 도큐멘트 클라우드: 두 개 이상의 장비에 도큐멘트 클라우드를 지원하는 응용 프로그램을 설치한 경우 iCloud는 장비 전체에서 최신 도큐멘트를 자동으로 유지합니다.

  • 응용 프로그램 및 도서: 구입한 응용 프로그램 및 도서는 모든 iOS 장비에 자동으로 나타납니다. 전에 구입한 응용 프로그램 및 도서를 다운로드할 수도 있습니다.

  • 백업: iCloud는 매일 전원에 연결되었을 때와 장비 화면이 잠겼을 때 Wi-Fi를 통해 iOS 장비를 자동으로 백업합니다. iCloud는 구입한 음악 및 TV 프로그램(미국만 해당), 응용 프로그램, 도서, 카메라 롤, 장비 설정, 응용 프로그램 데이터, 홈 화면 및 응용 프로그램 구성, 메시지(iMessage, SMS 및 MMS) 및 벨소리를 백업합니다.

  • 연락처, 캘린더, Mail: iCloud는 캘린더 및 연락처를 저장하고 장비 전체에서 최신 상태로 유지합니다. iCloud를 사용하면 새 메시지를 장비로 푸시하는 me.com 이메일 계정도 받습니다. iCloud는 또한 책갈피, 미리 알림메모를 저장하고 푸시합니다.

  • 나의 iPhone, iPad, iPod touch 또는 Mac 찾기: iPhone, iPad, iPod touch 또는 Mac을 분실한 경우는 나의 iPhone 찾기를 사용하여 지도에서 위치를 찾거나, 최대 음량으로 사운드를 재생하거나, 메시지를 보내거나, 화면을 잠그거나, 데이터를 지울 수 있습니다. 원하는 컴퓨터에서 icloud.com에 있는 나의 iPhone 찾기 웹 응용 프로그램을 사용하거나 iOS 장비로 무료 응용 프로그램을 다운로드하여 사용할 수 있습니다.

  • 나의 Mac으로 돌아가기: 나의 Mac으로 돌아가기를 사용하면 다른 Mac에서 인터넷을 통해 원격 Mac에 안전하게 연결하고 파일에 접근하거나 화면을 컨트롤할 수 있습니다.

iCloud를 사용하려면 먼저 iOS 5를 실행하는 iPhone, iPad 또는 iPod touch나 OS X Lion v10.7.2를 실행하는 Mac에서 iCloud 계정으로 로그인해야 합니다. 아직 iCloud 계정이 없거나 모든 장비에서 iCloud를 설정하지 않은 경우는 지금 iCloud를 설정합니다.

이미 장비에서 iCloud를 설정한 경우는 왼쪽에서 도움말 항목을 클릭하거나 검색을 사용하여 자세한 내용을 확인할 수 있습니다.

-포함된 보고서 만들기

아래와같이 부모리포트안에 자식리포트가 들어가는 경우가 되게 많다.

이때 자식리포트바인딩 방법과 부모 데이터를 자식리포트로 값을 넘기는 방법을 아래에서 설명 중.. ㅋ

image


자식리포트 삽입 작업화면

image


일단 위의 화면은 보고서가 두개이다

부모가 되는 리포트는 아래와 바인딩했다.

리포트 바인딩하기

 //리포트생성
ReportViewer reportViewer = new ReportViewer();
reportViewer.ProcessingMode = ProcessingMode.Local;
reportViewer.LocalReport.ReportEmbeddedResource = "WpfApplication1.Report1.rdlc";
reportViewer.LocalReport.EnableExternalImages = true;


자식리포트는 부모리포트에서 자식 리포트를 클릭한 다음 경로를 잡아 주면된다.

image

완성된  화면

아래 Sub report 부터는 wpfApplication1.ReportSub.rdlc 파일이다.

image

데이터바인딩

부모리포트가 바인딩 될 때 자식 리포트에 값을 바인딩 해주어야 한다.

그러기 위해선 SubreportProcessing 이벤트를 걸어서 바인딩시점에서 값을 넣어주면된다.

                //리포트생성
                ReportViewer reportViewer = new ReportViewer();
                reportViewer.ProcessingMode = ProcessingMode.Local;
                reportViewer.LocalReport.ReportEmbeddedResource = "WpfApplication1.Report1.rdlc";
                reportViewer.LocalReport.EnableExternalImages = true;

                ReportDataSource ds = new ReportDataSource("DataSet1", this._personlist);
                reportViewer.LocalReport.DataSources.Add(ds);
                //서브리포트의 데이터 바인딩을 위해 걸어둔다.
                reportViewer.LocalReport.SubreportProcessing += new SubreportProcessingEventHandler(LocalReport_SubreportProcessing);
                
                
                this.windowsFormsHost1.Child = reportViewer; //WPF
                reportViewer.RefreshReport();


자식리포트에 값 바인딩하기

e.Parameters["PersonKey"].Values[0]; 로 부모리포트의 값을 알아낼수있다.


        void LocalReport_SubreportProcessing(object sender, SubreportProcessingEventArgs e)
        {
            //서브디렉토리 데이터 바인딩..          

            string PersonKey =e.Parameters["PersonKey"].Values[0]; //부모데이터의 값 받아오기            

            var query = from c in this._personaddr
                        where c.PersonKey == PersonKey
                        select c;

            e.DataSources.Add(new ReportDataSource("DataSet1", query));
        }


-부모리포트에서 자식리포트로 부모의 파라메터 값 넘겨주기

부모리포트에서 자식리포트로 값을 넘겨줄 수 있다.

아래는 파라메터로 값을 넘기는 방법이다.


부모리포트에서 자식리포트에다가 파라메터를 지정해준다.

image

여기서는 PersonKey를 예제로 넘기고 있다.

image


자식리포트 파라메터변수 설정

다시 자식리포트에서 파라메터를 설정해준다.

중요! 부모리포트에서 넘기는 매개변수 이름과 자식매개변수이름이 같아야한다.

image


리포트에서 출력된 값

image


전체소스

using System;
using System.Collections.Generic;
using System.Linq;
using System.Text;
using System.Windows;
using System.Windows.Controls;
using System.Windows.Data;
using System.Windows.Documents;
using System.Windows.Input;
using System.Windows.Media;
using System.Windows.Media.Imaging;
using System.Windows.Shapes;
using Microsoft.Reporting.WinForms;

namespace WpfApplication1
{
    /// <summary>
    /// ReportTest.xaml에 대한 상호 작용 논리
    /// </summary>
    public partial class ReportTest : Window
    {
        List<Person> _personlist;
        List<PersonAddr> _personaddr;
        public ReportTest()
        {
            InitializeComponent();
            this.Loaded += new RoutedEventHandler(ReportTest_Loaded);  
        }

        void ReportTest_Loaded(object sender, RoutedEventArgs e)
        {
            //구라 데이터만들기
            _personlist = new List<Person>();
            _personaddr = new List<PersonAddr>();

            for (int i = 0; i < 30; i++)
            {
               string personkey = Guid.NewGuid().ToString();
                //사용자정보데이터
               _personlist.Add(new Person() { PersonKey = personkey, Age = i, Name = "jaedoo"+i.ToString() , Sex = 1 });
                //주소데이터
               _personaddr.Add(new PersonAddr() { PersonKey = personkey, addr1 = "부산광역시", addr2 = string.Format("동래구 온천동 {0}동", i.ToString()) });
            }


            CreateReport();


        }

        public void CreateReport()
        {
            try
            {
                //리포트생성
                ReportViewer reportViewer = new ReportViewer();
                reportViewer.ProcessingMode = ProcessingMode.Local;
                reportViewer.LocalReport.ReportEmbeddedResource = "WpfApplication1.Report1.rdlc";
                reportViewer.LocalReport.EnableExternalImages = true;

                ReportDataSource ds = new ReportDataSource("DataSet1", this._personlist);
                reportViewer.LocalReport.DataSources.Add(ds);
                //서브리포트의 데이터 바인딩을 위해 걸어둔다.
                reportViewer.LocalReport.SubreportProcessing += new SubreportProcessingEventHandler(LocalReport_SubreportProcessing);
                
                
                this.windowsFormsHost1.Child = reportViewer; //WPF
                reportViewer.RefreshReport();

            }
            catch (Exception ex)
            {
                MessageBox.Show(ex.Message);
            }
        }

        void LocalReport_SubreportProcessing(object sender, SubreportProcessingEventArgs e)
        {
            //서브디렉토리 데이터 바인딩..          

            string PersonKey =e.Parameters["PersonKey"].Values[0]; //부모데이터의 값 받아오기            

            var query = from c in this._personaddr
                        where c.PersonKey == PersonKey
                        select c;

            e.DataSources.Add(new ReportDataSource("DataSet1", query));
        }

    }


}


데이터용으로 사용된 가라 데이터

using System;
using System.Collections.Generic;
using System.Linq;
using System.Text;

namespace WpfApplication1
{
    public class Person
    {
        public Person()
        {

        }

        public Person(string name, int age, int sex)
        {
            this.Name = name;
            this.Age = age;
            this.Sex = sex;
        }

        public string PersonKey { get; set; }

        public string Name { set; get; }

        public int Age { set; get; }

        public int Sex { set; get; }

        
    }
    /// <summary>
    /// 서브디렉토리 데이터
    /// </summary>
    public class PersonAddr
    {
       public string addr1 { set; get; }
       public string addr2 { set; get; }

       public string PersonKey { get; set; }
    }


}

한페이지에 하나씩보여주기

리포트 한페이지에 하나씩 보여주고 싶을때 처리하는 방법이다.

아래는 간단한 예제이다

image

image

image


사용방법

image

목록을 끌어와서 리포트 한장 에 가득채운다.

그럼 리포트 한장에 목록하나가 되는것이다

image

그런 다음 아래와 같이 그룹속성을 선택 한다.

image


그룹속성에서 페이지 나누기 하면 끗~

image

이제 리포트 하나당 한명씩 (하나의컨텐츠) 볼 수 있다.

image

WPF 툴킷입니다.

다운로드 : http://wpftoolkit.codeplex.com/

사용환경

image

아래는 몇개의 DEMO 컨트롤

BusyIndicator

image

CalculatorUpDown

image

돋보기도 있네? ㅋ

image

The Extended WPF Toolkit is a collection of WPF controls, components and utilities made available outside the normal WPF Toolkit.

What's in the 1.5.0 Release?

사용방법

Instructions for using the Extended WPF Toolkit binaries:

  1. Install .NET Framework 4.0
  2. Download the ExtendedWPFToolkit_Binaries
  3. Unblock the ZIP file.
    1. Right-click ExtendedWPFToolkit_Binaries.zip -> Properties -> Unblock
  4. Unzip the ExtendedWPFToolkit_Binaries.zip
  5. Reference the binaries in your project:
    1. Reference WPFToolkit.Extended.dll in your project
    2. Add a using statement ("using Microsoft.Windows.Controls;") to the top of .cs files
    3. Add a new xmlns (for example, xmlns:extToolkit="http://schemas.microsoft.com/winfx/2006/xaml/presentation/toolkit/extended") to the top of XAML files
    4. Remember to use the namespace prefix (in the above example, <extToolkit: ...>) in the body of your XAML

다운로드 경로

http://www.microsoft.com/download/en/details.aspx?id=27165#instructions


Overview

This software development kit (SDK) provides the binaries and programming reference for the Bing Maps WPF Control (Beta). You can use this control to build your own applications that use Bing Maps.

image

Session Feedback

Attendees can submit feedback on BUILD sessions online.

Keynote and session videos

Day 1 Keynote

Keynotes from Day 1

Day 2 Keynote

Keynotes from Day 2

8 traits of great Metro style apps

Platform for Metro style apps

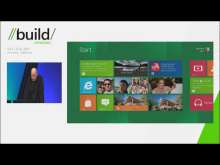
windows 8 소개는 여기서.

http://www.buildwindows.com/

다운로드는 여기서..

http://msdn.microsoft.com/en-us/windows/home/

출처:

http://blogs.msdn.com/b/jasonz/archive/2011/09/14/announcing-visual-studio-11-developer-preview.aspx


Announcing Visual Studio 11 Developer Preview

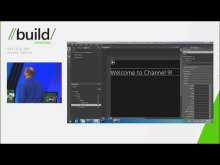
Today in the BUILD keynote I had the opportunity to show some of the new functionality in Microsoft® Visual Studio® 11 Developer Preview and Microsoft® Team Foundation Server Preview. MSDN subscribers can download the previews today as well as the new release of .NET Framework 4.5 Developer Preview; general availability is on Friday, September 16.

Some exciting announcements are being made here at BUILD. Visual Studio 11 provides an integrated development experience that spans the entire lifecycle of software creation from architecture to code creation, testing and beyond. This release adds support for Windows 8 and HTML 5, enabling you to target platforms across devices, services and the cloud. Integration with Team Foundation Server enables the entire team to collaborate throughout the development cycle to create quality applications.

.NET 4.5 has focused on top developer requests across all our key technologies, and includes new features for Asynchronous programming in C# and Visual Basic, support for state machines in Windows Workflow, and increased investments in HTML5 and CSS3 in ASP.NET.

We’ve shared a lot at BUILD already, for more on the future of Windows development I suggest you take a look at Steven Sinofsky and S. Somasegar’s blogs. More details on Team Foundation Server including the new service announced at BUILD and how we’re helping teams be more productive can be found on Brian Harry’s blog.

Quick Tour around Visual Studio 11 Features

Visual Studio 11 has several new features, all designed to provide an integrated set of tools for delivering great user and application experiences; whether working individually or as part of a team. Let me highlight a few:

Develop Metro style Apps for Windows 8

Visual Studio 11 includes a set of templates that get you started quickly developing Metro style applications with JavaScript, C#, VB or C++. The blank Application template provides the simplest starting point with a default project structure that includes sample resources and images. The Grid View, Split View, and Navigation templates are designed to provide a starting point for more complex user interfaces.

다운로드

제이쿼리로 만들어진 트리뷰 플러그 인

http://jquery.bassistance.de/treeview/demo/?3.0.2.2


image

Microsoft Showcase

http://www.microsoft.com/showcase/ko/kr/default.aspx

XP 에서 닷넷프레임워크4.0을 아예 설치를 못하는경우가 발생하는 경우가 있습니다.

아래의 경로의 파일을 설치 하면됩니다.

http://www.microsoft.com/download/en/details.aspx?displaylang=en&id=32

대상PC

-WINDOWS XP  서비스팩이 2 이하인 PC

-불법복제로 윈도우즈 업데이트가 막혀져있는 PC

(불법복제 윈도우즈는 인증을 막기위해 HOST가 변경되어져 있거나 MS 사의 업데이트서버로의  접속이 막혀있습니다)


해결방법

Windows Imaging Component (wic_x86_enu.exe) 설치

http://www.microsoft.com/download/en/details.aspx?displaylang=en&id=32


ps

xp 에서 닷넷프레임워크 3.5로 작업시  ico 파일이 문제를 일으키는 경우가 있었는데 왠지 이거 설치하면 될꺼 같은데???

테스트하긴 귀찮음 ㅎ

+ Recent posts