출처 : Scottgu 형님 사이트
개발환경다운로드
Windows Phone Developer Tools CTP
Building a “Hello World” Windows Phone 7 Application
First make sure you’ve installed the Windows Phone Developer Tools CTP – this includes the Visual Studio 2010 Express for Windows Phone development tool (which will be free forever and is the only thing you need to develop and build Windows Phone 7 applications) as well as an add-on to the VS 2010 RC that enables phone development within the full VS 2010 as well.
After you’ve downloaded and installed the Windows Phone Developer Tools CTP, launch the Visual Studio 2010 Express for Windows Phone that it installs or launch the VS 2010 RC (if you have it already installed), and then choose “File”->”New Project.” Here, you’ll find the usual list of project template types along with a new category: “Silverlight for Windows Phone”. The first CTP offers two application project templates. The first is the “Windows Phone Application” template - this is what we’ll use for this example. The second is the “Windows Phone List Application” template - which provides the basic layout for a master‑details phone application:
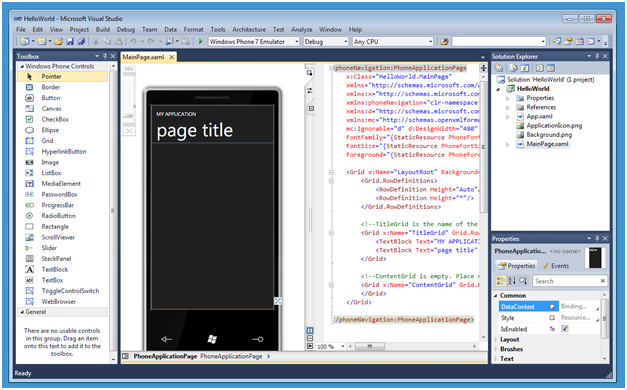
After creating a new project, you’ll get a view of the design surface and markup. Notice that the design surface shows the phone UI, letting you easily see how your application will look while you develop. For those familiar with Visual Studio, you’ll also find the familiar ToolBox, Solution Explorer and Properties pane.
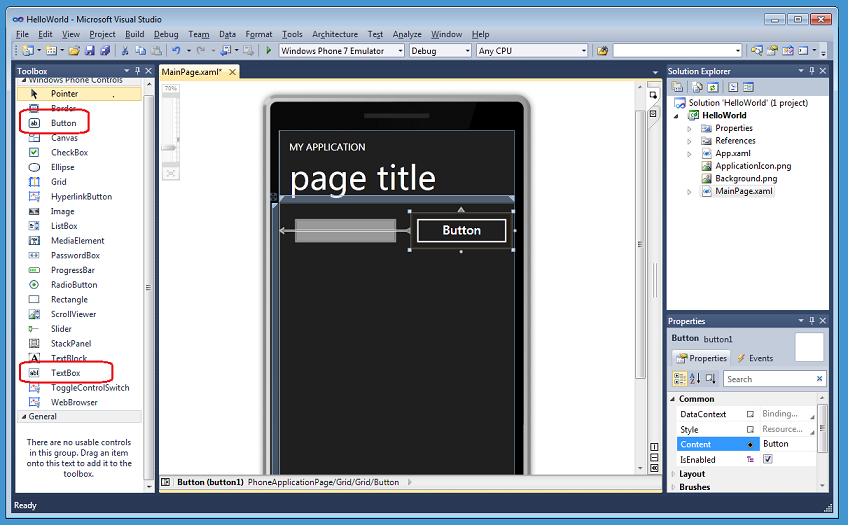
For our HelloWorld application, we’ll start out by adding a TextBox and a Button from the Toolbox. Notice that you get the same design experience as you do for Silverlight on the web or desktop. You can easily resize, position and align your controls on the design surface. Changing properties is easy with the Properties pane. We’ll change the name of the TextBox that we added to username and change the page title text to “Hello world.”
We’ll then write some code by double‑clicking on the button and create an event handler in the code-behind file (MainPage.xaml.cs).
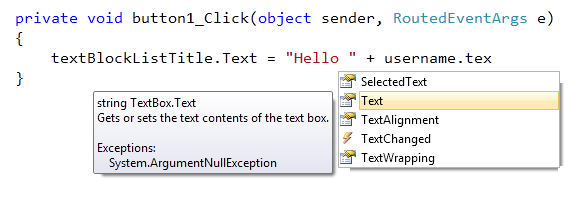
We’ll start out by changing the title text of the application. The project template included this title as a TextBlock with the name textBlockListTitle (note that the current name incorrectly includes the word “list”; that will be fixed for the final release.) As we write code against it we get intellisense showing the members available. Below we’ll set the Text property of the title TextBlock to “Hello “ + the Text property of the TextBox username:
We now have all the code necessary for a Hello World application. We have two choices when it comes to deploying and running the application. We can either deploy to an actual device itself or use the built‑in phone emulator:
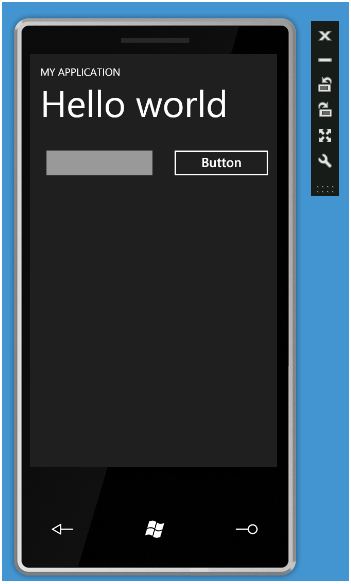
Because the phone emulator is actually the phone operating system running in a virtual machine, we’ll get the same experience developing in the emulator as on the device. For this sample, we’ll just press F5 to start the application with debugging using the emulator. Once the phone operating system loads, the emulator will run the new “Hello world” application exactly as it would on the device:
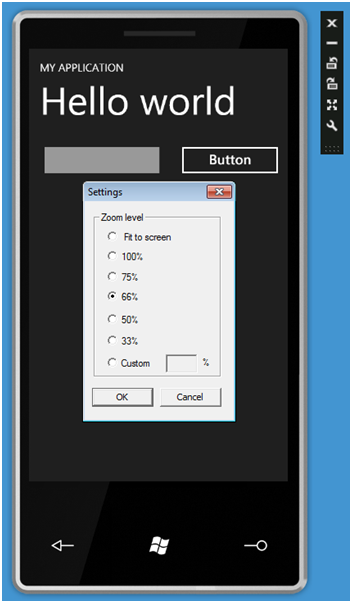
Notice that we can change several settings of the emulator experience with the emulator toolbar – which is a floating toolbar on the top right. This includes the ability to re-size/zoom the emulator and two rotate buttons. Zoom lets us zoom into even the smallest detail of the application:
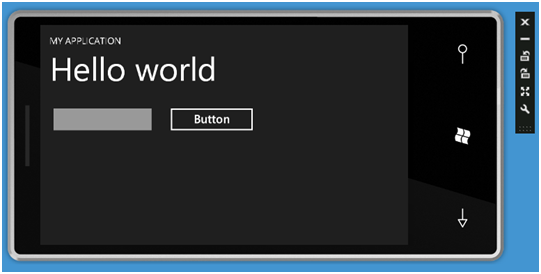
The orientation buttons allow us easily see what the application looks like in landscape mode (orientation change support is just built into the default template):
Note that the emulator can be reused across F5 debug sessions - that means that we don’t have to start the emulator for every deployment. We’ve added a dialog that will help you from accidentally shutting down the emulator if you want to reuse it. Launching an application on an already running emulator should only take ~3 seconds to deploy and run.
Within our Hello World application we’ll click the “username” textbox to give it focus. This will cause the software input panel (SIP) to open up automatically. We can either type a message or – since we are using the emulator – just type in text. Note that the emulator works with Windows 7 multi-touch so, if you have a touchscreen, you can see how interaction will feel on a device just by pressing the screen.
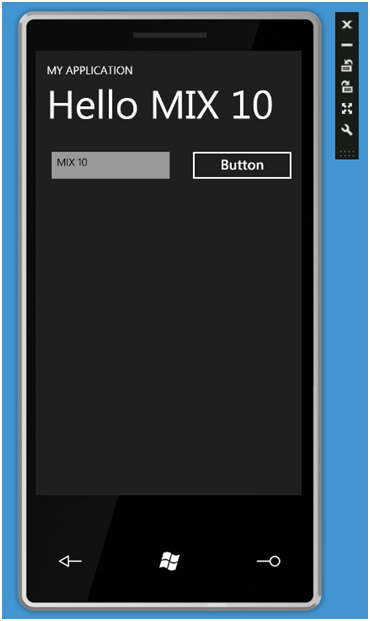
We’ll enter “MIX 10” in the textbox and then click the button – this will cause the title to update to be “Hello MIX 10”:
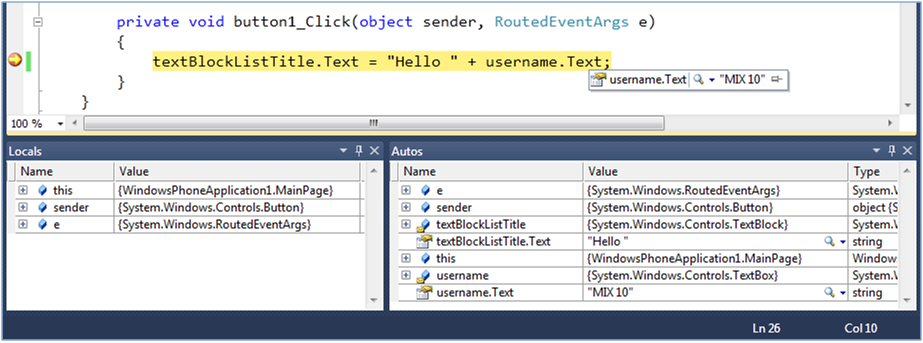
We provide the same Visual Studio experience when developing for the phone as other .NET applications. This means that we can set a breakpoint within the button event handler, press the button again and have it break within the debugger:
Building a “Twitter” Windows Phone 7 Application using Silverlight
Rather than just stop with “Hello World” let’s keep going and evolve it to be a basic Twitter client application.
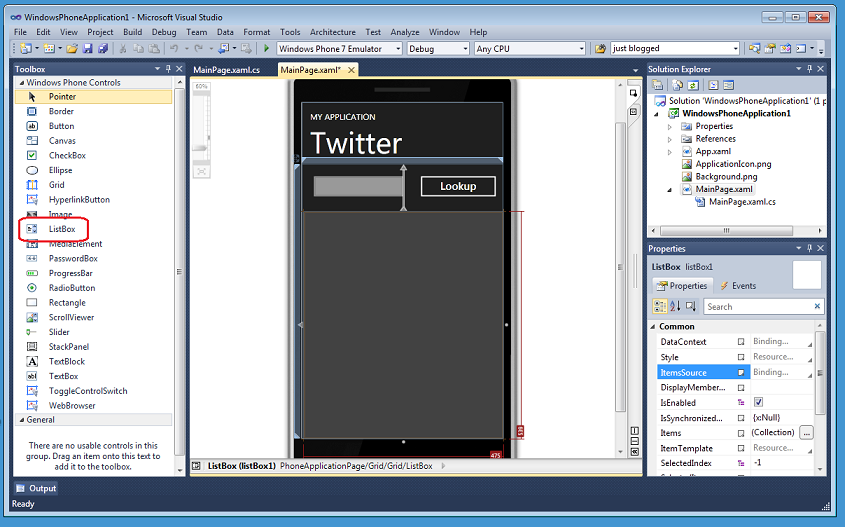
We’ll return to the design surface and add a ListBox, using the snaplines within the designer to fit it to the device screen and make the best use of phone screen real estate. We’ll also rename the Button “Lookup”:
We’ll then return to the Button event handler in Main.xaml.cs, and remove the original “Hello World” line of code and take advantage of the WebClient networking class to asynchronously download a Twitter feed. This takes three lines of code in total: (1) declaring and creating the WebClient, (2) attaching an event handler and then (3) calling the asynchronous DownloadStringAsync method.
In the DownloadStringAsync call, we’ll pass a Twitter Uri plus a query string which pulls the text from the “username” TextBox. This feed will pull down the respective user’s most frequent posts in an XML format. When the call completes, the DownloadStringCompleted event is fired and our generated event handler twitter_DownloadStringCompleted will be called:
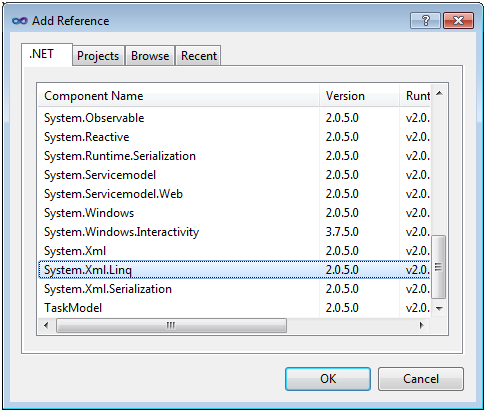
The result returned from the Twitter call will come back in an XML based format. To parse this we’ll use LINQ to XML. LINQ to XML lets us create simple queries for accessing data in an xml feed. To use this library, we’ll first need to add a reference to the assembly (right click on the References folder in the solution explorer and choose “Add Reference):
We’ll then add a “using System.Xml.Linq” namespace reference at the top of the code-behind file at the top of Main.xaml.cs file:
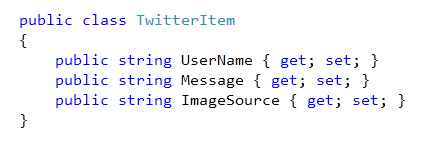
We’ll then add a simple helper class called TwitterItem to our project. TwitterItem has three string members – UserName, Message and ImageSource:
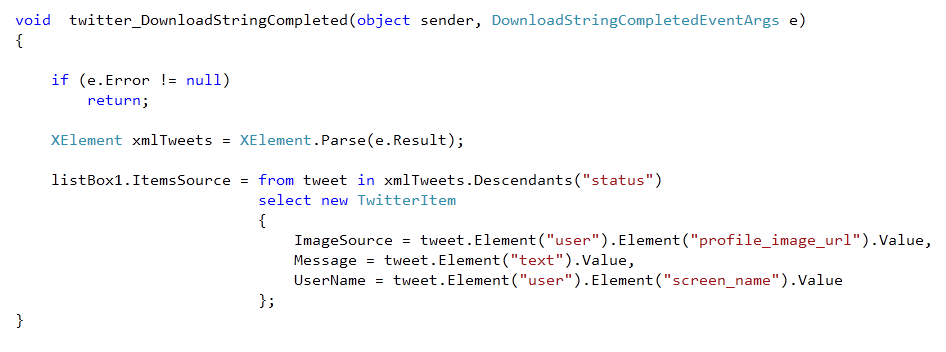
We’ll then implement the twitter_DownloadStringCompleted event handler and use LINQ to XML to parse the returned XML string from Twitter. What the query is doing is pulling out the three key pieces of information for each Twitter post from the username we passed as the query string. These are the ImageSource for their profile image, the Message of their tweet and their UserName. For each Tweet in the XML, we are creating a new TwitterItem in the IEnumerable<XElement> returned by the Linq query.
We then assign the generated TwitterItem sequence to the ListBox’s ItemsSource property:
We’ll then do one more step to complete the application. In the Main.xaml file, we’ll add an ItemTemplate to the ListBox. For the demo, I used a simple template that uses databinding to show the user’s profile image, their tweet and their username.
<ListBox Height="521" HorizonalAlignment="Left" Margin="0,131,0,0" Name="listBox1" VerticalAlignment="Top" Width="476"><ListBox.ItemTemplate> <DataTemplate> <StackPanel Orientation="Horizontal" Height="132"> <Image Source="{Binding ImageSource}" Height="73" Width="73" VerticalAlignment="Top" Margin="0,10,8,0"/> <StackPanel Width="370"> <TextBlock Text="{Binding UserName}" Foreground="#FFC8AB14" FontSize="28" /> <TextBlock Text="{Binding Message}" TextWrapping="Wrap" FontSize="24" /> </StackPanel> </StackPanel> </DataTemplate> </ListBox.ItemTemplate></ListBox>
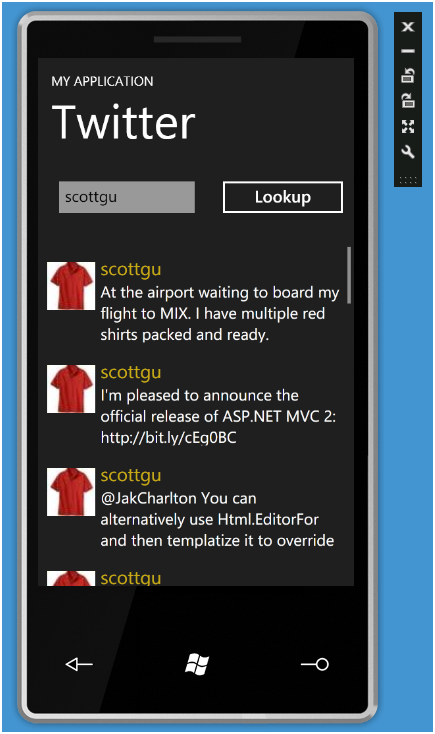
Now, pressing F5 again, we are able to reuse the emulator and re-run the application. Once the application has launched, we can type in a Twitter username and press the Button to see the results. Try my Twitter user name (scottgu) and you’ll get back a result of TwitterItems in the Listbox:
Try using the mouse (or if you have a touchscreen device your finger) to scroll the items in the Listbox – you should find that they move very fast within the emulator. This is because the emulator is hardware accelerated – and so gives you the same fast performance that you get on the actual phone hardware.
'Windows Phone' 카테고리의 다른 글
| [MSDN] Controls for Windows Phone (0) | 2011.02.07 |
|---|---|
| Windows Mobile Device Center 6.1 다운로드 (0) | 2010.07.28 |
| [PDF]WINDOWS PHONE 7 개발하기 (0) | 2010.04.08 |
| Windows Phone 개발 지원 사이트 (0) | 2010.03.24 |
| [가상GPS]FakeGPS 설치 (0) | 2010.03.09 |
| 사용중인 프로세스 목록 불러오기 (0) | 2010.02.03 |
| [옴니아 배포 디버깅]실제 모바일기기에 배포 및 테스트하기 (0) | 2010.02.03 |
| sqlce 파일 구분 (0) | 2010.02.03 |
| [MSDN]"How Do I?" Videos for Devices (0) | 2010.02.02 |
| [marketplace] MS 판 엡스토어 (0) | 2010.01.21 |

